Support for ADHD Planner #
To access your ADHD Planner, you'll need to install Notion first. Follow this guide for a quick and straightforward setup.
1. Installing Notion #
For Desktop (Windows/Mac): #
- Visit the Notion Website: Go to Notion's official website.
- Download the App: Click on the "Download" button, usually located at the top right corner. Choose the version that matches your operating system (Windows or Mac).
- Run the Installer: Once downloaded, open the installer and follow the on-screen instructions to install Notion on your computer.
- Launch Notion: After installation, open Notion. You can sign up for a new account or log in if you already have one.
For Mobile (iOS/Android): #
- Go to Your App Store: On iOS, open the App Store. On Android, open the Google Play Store.
- Search for Notion: Type "Notion" in the search bar.
- Install: Click on the Notion app from the search results and tap "Install" or "Get".
- Open the App: Once installed, open the app and either sign up for a new account or log in.
2. Installing the ADHD Planner in Notion #
Follow these simple steps to get the ADHD Planner set up in your Notion account:
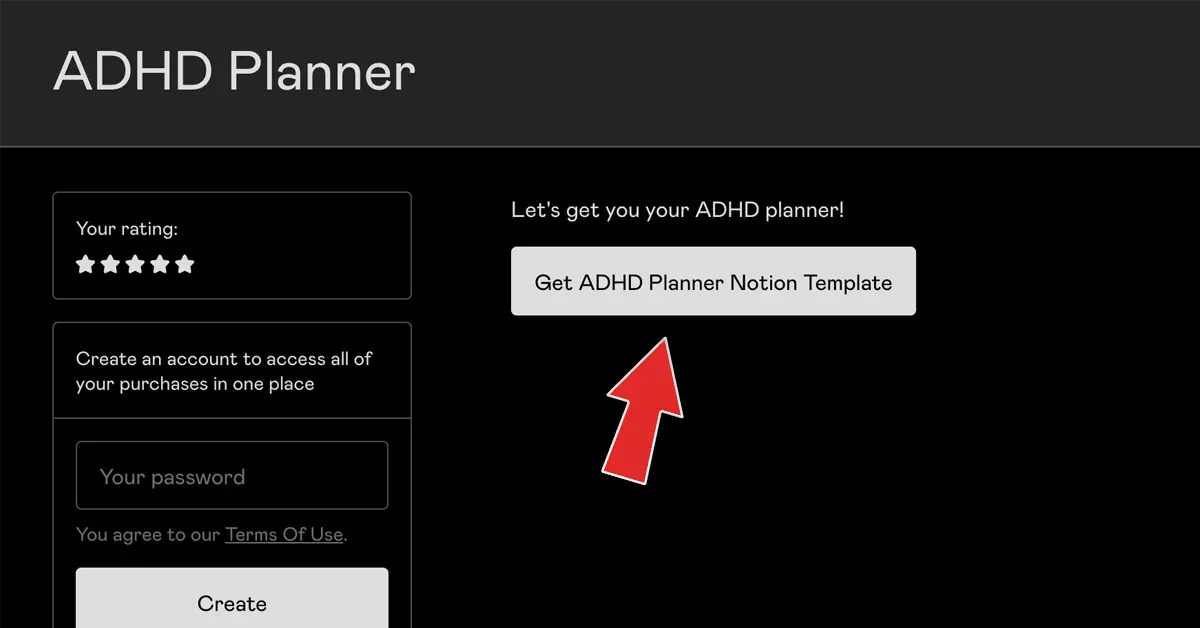
- Access the Confirmation Email: Navigate to your inbox and locate the confirmation email from Gumdrop.
- Access the Template: Within the email, click on the button labeled "Get ADHD Planner Notion Template".
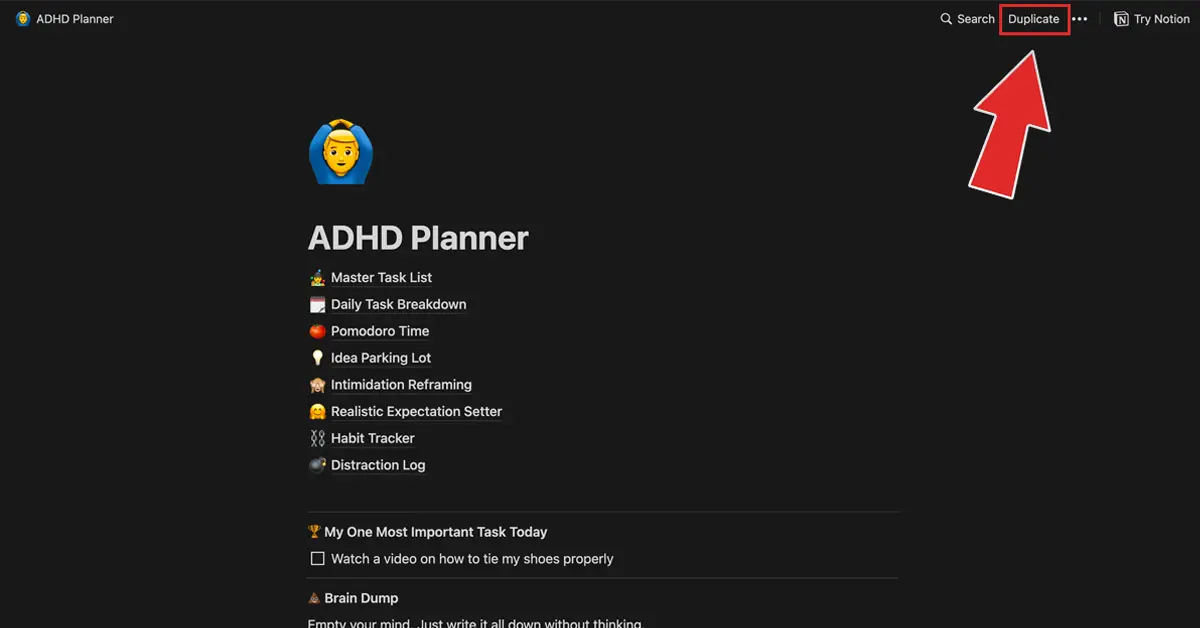
- Duplicate the Template: Once the template opens in your browser, look for the "Duplicate" button in the top right corner and click on it.
That's it! The ADHD Planner template is now added to your Notion workspace. You can access it from any device where you've installed Notion, ensuring productivity and organization are always at your fingertips.
If you still need help, don't hesitate to reach out to us.